
Change is a constant in the world of technology, and operating systems are no exception. Windows 11, with its sleek interface and improved features, may have tempted you into upgrading to Windows 11. Yet, as with any change, there can be a multitude of reasons why you might want to revert to your previous OS or explore alternative options. In this guide, we’ll explain how to uninstall Windows 11.
Whether you’re facing compatibility issues, prefer the familiarity of an earlier Windows version, or simply feel that what was once the best desktop you’ve ever had has become the worst, we’ve got you covered.
Before we begin, there are certain conditions that might need to be met. You can uninstall Windows 11 and retain your files only within a 10-day window following the installation. Beyond that timeframe, you will need to perform what is commonly referred to as a “clean install” of either Windows 10 or your previous operating system. We will provide step-by-step instructions for both methods, ensuring you have the information you need to proceed.
Still undecided about whether to uninstall or keep Windows 11? Have a look at our guide to Windows 10 versus Windows 11.
Image used with permission by copyright holder
Rollback to Windows 10 and keep your files
The most simple method for uninstalling Windows 11 involves reverting to Windows 10. This approach ensures that none of your files are lost. However, there is a crucial caveat – you must initiate this process within 10 days of your initial Windows 11 update. If this timeframe applies to your situation, please follow the steps outlined below. Otherwise, you can proceed to the next section.
Step 1: Open the Windows 11 settings menu with Windows key + I.
Step 2: On the sidebar, click Windows update.
Step 3: In the middle of your screen, click Advanced options.
Step 4: Click Recovery followed by the Go back button.
Step 5: If you are using a laptop, plug it into a power outlet, and follow the steps on the screen.
After a few restarts, your PC will be set back to Windows 10 and will no longer be on Windows 11. This is the safest and easiest way to go back to Windows 10 as it keeps everything in place. You will not lose any of your files or documents, but any apps you installed while using Windows 11 will no longer be present.
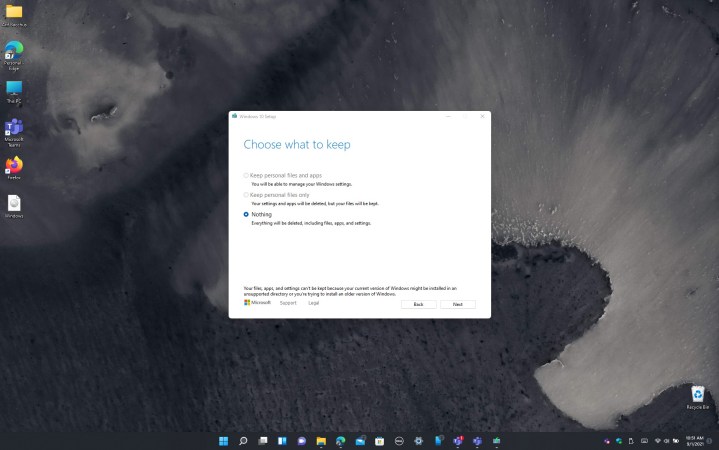
Image used with permission by copyright holder
Install Windows 10 via an ISO and delete your files
An alternative approach to uninstalling Windows 11 and returning to Windows 10 involves using an ISO file. This method is essential if you have exceeded the 10-day rollback limit, but it comes with a significant trade-off: all your files and applications will be lost, requiring a fresh start.
Before you proceed, we strongly recommend saving your files to external storage to ensure you can access them after the Windows 11 uninstallation process. Once your files are safely backed up, you can follow the steps detailed below.
Step 1: Visit Microsoft’s website and download the Windows 10 Media Creation Tool.
Step 2: Once the tool is downloaded, launch it on your Windows 11 system, and agree to Microsoft’s terms of service.
Step 3: Choose the option to create installation media for another PC and click Next, and then Next once more.
Step 4: Choose ISO file and then choose Next.
Step 5: Choose a location to save the file to (the desktop is a good place).
Step 6: Allow Windows 10 to download.
Step 7: Click Finish, and then navigate to where you saved the ISO.
Step 8: Double-click to launch the ISO file. Look for the Setup icon and click it, then follow the instructions on your screen to downgrade back to Windows 10.
It’s essential to thoroughly test and evaluate Windows 11 within the initial 10-day period to determine your satisfaction with the operating system. If the 10-day grace period has passed, the sole method for uninstalling Windows 11 and returning to Windows 10 entails the use of an ISO file. This process means a clean installation of Windows 10 and result in the loss of access to your files and applications. Therefore, timely evaluation is crucial to avoid this scenario.
Editors’ Recommendations