Recording your screen is an incredibly useful feature available on Windows 11. In a professional capacity, it allows you to capture your screen to highlight issues or show off a new workflow to your colleagues. You can also record a presentation that can be shared throughout the company. For gaming, it lets you record a clip of action that can then be shared with friends or posted online. If you’re trying to figure out how to record your screen on Windows 11, you’ll be glad to know the process is simple (at least, once you know where to look).
Here’s a look at how to record your screen in Windows 11 using Screen Recorder, Xbox Game Bar, and more.
Windows
Screen Recorder
The Snipping Tool now lets you use a feature called Screen Recorder. This makes it easy to record your screen without much fuss. Here’s how it works.
Step 1: Search for “Snipping Tool” in the Start menu.
Step 2: Press the Record button in the toolbar, then select New.
Step 3: Select the area of the screen you want to record.
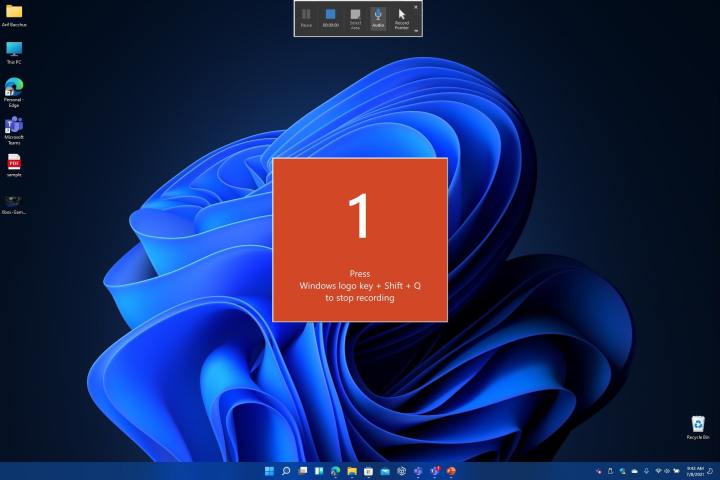
Step 4: Press Start. This should begin a countdown. When the countdown hits zero, your screen recording will begin.
Step 5: When you’re ready to stop filming, press Stop. Windows 11 will then let you choose where to save or share the video.

Microsoft
Xbox Game Bar
Though it’s mainly made for gaming, it can record any app you have open, as long as it’s one window at a time. You also can enable your microphone during recording if you need it.
Step 1: To use the Xbox Gamebar, your PC will need to support a set of encoders. This shouldn’t be a problem, though, as these encoders are enabled on all the most recent graphics cards and Intel processors.
Step 2: To get started with Xbox Game Bar, visit the Windows 11 Start menu and search for Game Bar. There should be a settings link on the search results on the screen for Enable Xbox Game Bar. You’ll want to click this, visit the settings, and make sure the switch is turned to On.
Step 3: Once the Xbox Game Bar is turned on, you can record your screen at any time in Windows 11 with the Windows + G keys. Just make sure that you have an app open in the background. Xbox Game Bar won’t record your desktop or multiple windows — it only works on a single window.
Step 4: Once you’ve pressed the dual-key command, you’ll see a Record icon at the top-left of your screen. If you tap that button, the Game Bar will minimize and start recording. You can stop at any time with the Stop button on the top-right of the screen. You can also toggle your microphone by clicking the Microphone icon.
Step 5: Your recordings will save by default to the Captures folder in Videos in File Explorer.
Microsoft
PowerPoint
Another way to record your screen in Windows 11 is with PowerPoint. PowerPoint will let you record multiple windows at once. However, you’ll need to ensure that you have a Microsoft 365 subscription for it to work properly.
Step 1: To get started, open a new PowerPoint file and then click the Insert menu. Then, you should see a Screen Recording button. Hit that, and then begin your recording. The screen will dim, and you’ll see a toolbar appear.
Step 2: Select where you want to record, and click the red Record button. The recording will begin. When you finish, click Windows + Shift + Q to end the recording.
Step 3: You can then save your recording by right-clicking on the PowerPoint slide with the recording and choosing the Save Media As from the list. Choose where you want to save the file, and you’re done!
Other options
There are many third-party tools you can choose from to record your screen. OBS Studio is one of our favorites. This app is available in the Microsoft Store for download.
Just open up the Microsoft Store in Windows 11, search for it, and install. Choose Optimize for Recording, and once you’re up and running, you can start a screen recording by adding your desktop screen as Display Capture to the source in the bottom-middle of the screen. Be sure to mute the microphone under Audio Mixer and then hit Start Recording. When done, hit Stop Recording and visit your Videos folder to see the saved file.
Editors’ Recommendations