
You may find that Google Docs has a UI that is almost too clean. It can be difficult to find basic things you’re used to, such as margin settings. Don’t worry, though, you can change margins in Google Docs just like with any other word processor through a couple of different means.
If you have an exact margin measurement in mind, we recommend trying the Page Setup method first. On the other hand, if you want more visual and stylistic control (or want to control your indents, too) going directly to the ruler on the page is more advisable.
Using Page Setup
This is the easiest way to change margins in Google Docs, because using the Page Setup option pretty much automates the adjustments for you.
Step 1: Open your desired Google Docs file or create a new one.
Step 2: If you only need to change the margins for a specific portion of text, then select the paragraph or lines and then click File, located in the top-left corner.
If you want to apply margin changes to the whole document, just click on File.
screenshot
Step 3: From the File drop-down menu, select Page Setup. You may need to scroll down to see this option.
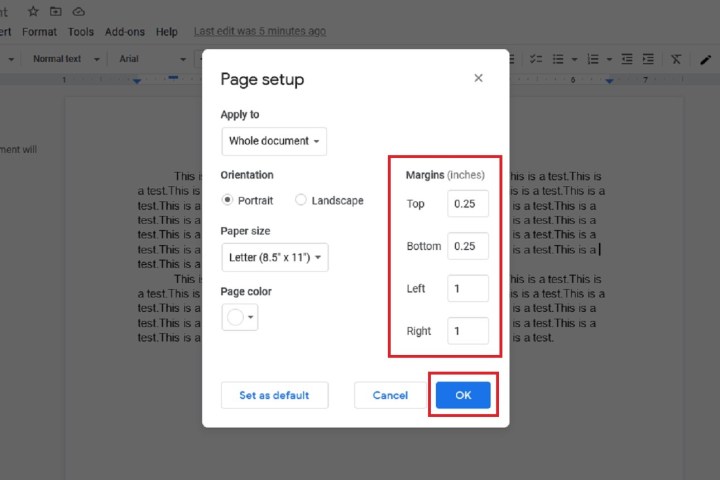
Step 4: The Page Setup dialog box will appear. Under the section labeled Margins are four little text boxes in which you can input your desired measurement of each margin — in inches, for all four sides of the document: Top, Bottom, Left, and Right.
screenshot
Step 5: After you’ve added your desired measurements, click OK to save your changes. The margins in your document should automatically adjust to your specified measurements.
Using the ruler
If you want just a bit more control over each individual margin, you can use the ruler that surround your document. It has five key zones:
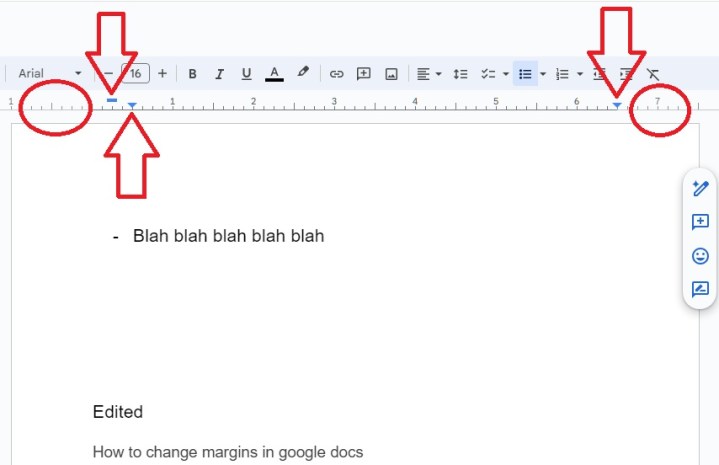
Image used with permission by copyright holder
- The left-most zone, indicated by the circle, sets the left indent. Click and drag this to move your left indent.
- The blue bar sets the first line indent.
- The left-most blue arrow will set the left indent for further indents, such as in bulleted lists. This will often be directly below the blue bar.
- The right-most arrow sets the start for text when you align right.
- If you click to the right of the arrow, you can set the right margin in much the same way as you can set the left margin.
You can also click on the ruler between the blue arrows to set tab stops, allowing you more control over where the cursor lands when you press Tab.
Editors’ Recommendations