Straight from the developers of one of history’s most influential indie horror games, Outlast, comes the third installment in the series, The Outlast Trials. Red Barrels intended Trials to be a prequel to the first two games, set during the Cold War era. Although the game initially launched for PC players last year, the full access version is now available to newer generation console owners as well. Jumping head-first into The Outlast Trials can be a little confusing, so let’s go over some handy tips to enhance the beginner experience.
Like the first two games, Trials plays from a first-person perspective, except instead of controlling Miles Upshur or Blake Langermann, players get to choose customizable characters for a four-player cooperative mode — a first for the franchise.
Acquire Rigs From Cornelius Noakes
WWII veteran Cornelius Noakes is your go-to source for character add-ons, known as Rigs. He can be found in the Sinyala Facility, where he is a prisoner of the facility, much like its inmates. Noakes is an NPC vendor restricted to his storefront, so he won’t ever move locations or disappear. He can be accessed at any time to upgrade characters.
There are four types of Rigs; Stun, Heal, X-Ray, and Blind. You can purchase and upgrade these Rigs to make them more effective in a combat scenario. Although players cannot physically attack enemies, they can use Rigs as a means of distraction or to buy themselves time.
For example, X-Ray enhances stealth, Blind helps with overall escape probability, and Stun incapacitates enemies for a short time. However, in order to continue using these Rigs, you must find Rig Batteries hidden throughout the map, usually found in lockers and cabinets.
Conserve Your Resources
Just like the original Outlast and its sequel, conserving resources is a vital component to survival. For instance, Miles must conserve his camera’s battery life in order to make use of its night-vision capability. The same goes for Blake. When you run out of batteries, you can no longer transverse dark spaces without opening yourself up to a sneak attack.
In Trials, you must strategically consume items for experience points and also to escape sticky situations. Empty bottles and bricks can be used against enemies to create some distance and also earn some XP.
However, the inventory bar is limited to only three items, so it is crucial to not waste a slot on an item that is of no use to you. When in doubt, carry one of everything. If you decide to play with friends, assign each teammate a different role, so that a healer can prioritize antidotes, whereas a stunner can enter the fray and stir up commotion to the benefit of the squad.
Beginners should focus on health, batteries, and antidotes. These are the main items worth keeping in your inventory.
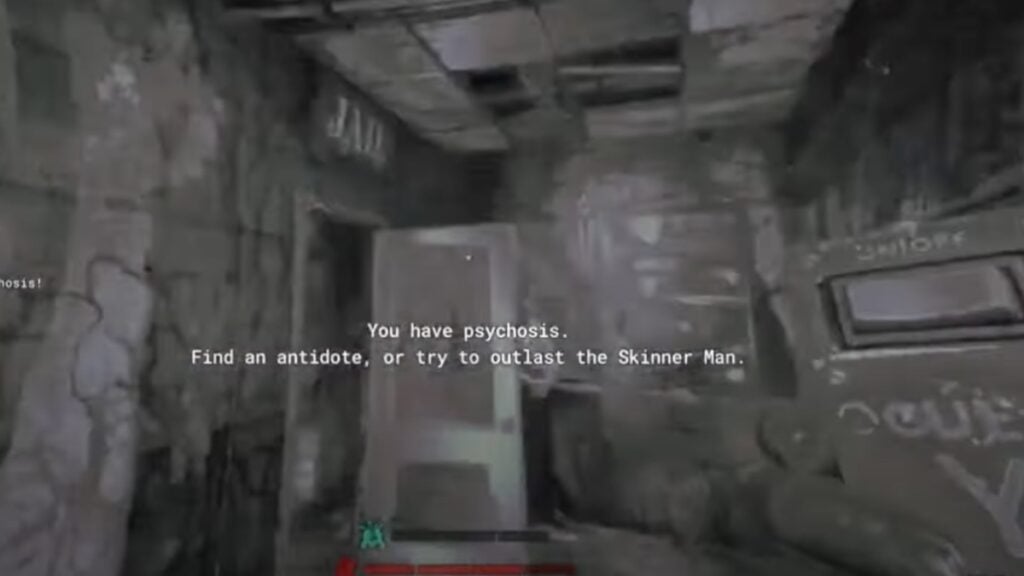
Additionally, your character has a sanity level, represented by three green bars. It decreases when exposed to enemies and dark environments. Antidotes can restore your sanity. If your sanity level runs out, the Skinner Man appears. He will remain in-game until the players either restores their sanity or ‘outlasts’ him.
Pick Locks to Obtain Rig Batteries
As mentioned, Rig Batteries are found throughout the facility inside lockers and cabinets. You will also find green lockboxes containing Rig Batteries, but they require a lock pick. It is imperative to carry a lock pick with you at all times, as locked containers often have useful items inside.
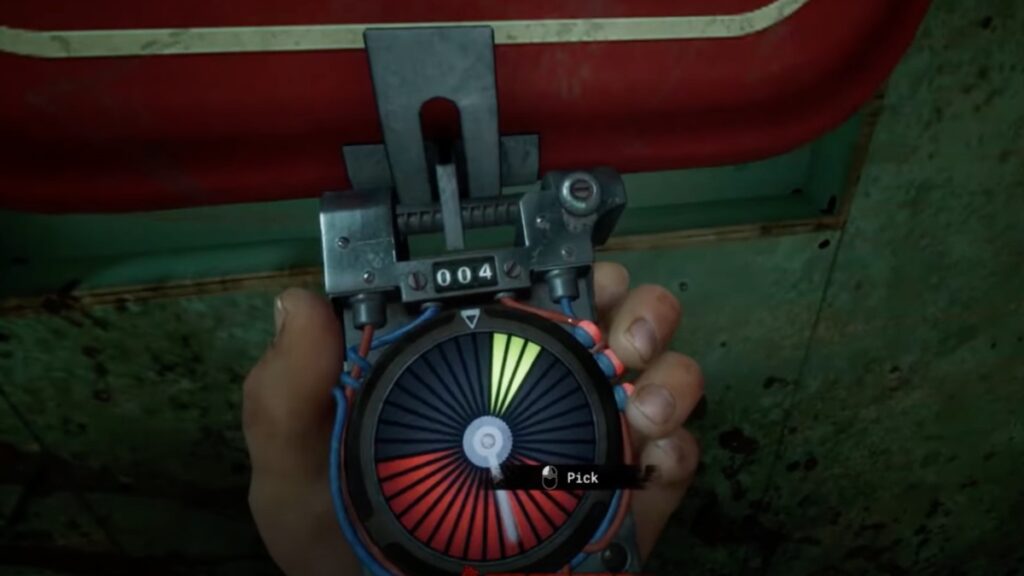
Unsuccessful attempts to pick locks results in a decrease in sanity. Occasionally, you might even find a skeleton key, which is an unbreakable lock pick that allows you to instantly open any container with no detriment to your sanity.
Be Wary of Murkoff’s Property
At intervals throughout the trial, you will enter Murkoff’s Property. In these certain areas, your gear stops working. This is intended to make the trial harder. This impairment will last until you leave Murkoff’s Property. During this time, you also need to be wary of boobytrapped doors. Murkoff has rigged some doors to alert enemies if you open them too quickly. To avoid this, open the doors slowly or disarm the traps near the entrance.

There are even traps on doors that release spikes containing hallucinogenics which will decrease your sanity over time. Broken glass on the ground can also reveal your location, so the best advice is to pay attention to your surroundings and proceed with caution. If you can avoid broken glass or disarm a door safely, then do so. It might just save your life.
Utilize Lockers (Duh!)
If there has been one constant in the Outlast trilogy, it is the player’s ability to hide in lockers. Aside from the night-vision video camera, it is one of the most distinctive features of the game. In order to avoid enemies, you can hide in lockers until the danger passes. If you spot an enemy who hasn’t seen you, utilize hiding spots to get by without alerting them. But be warned: enemies can spot you peeking out of a hiding spot if they are too close.

Only run when you absolutely have to.
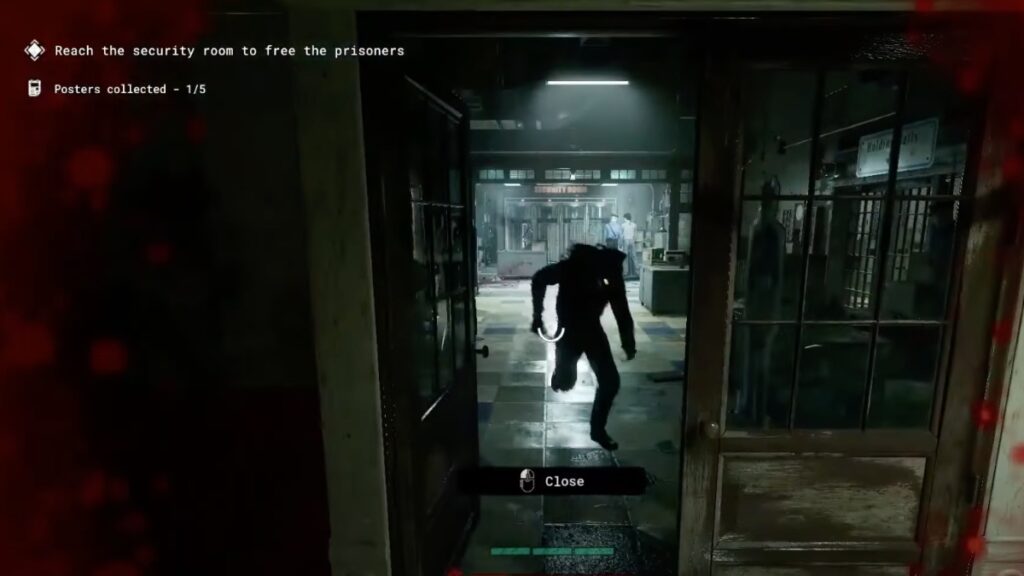
If an enemy is chasing you, the best tactic is to close doors behind you to slow them down and give yourself time to recuperate. It is important to slam the doors shut instead of closing them slowly to keep the distance between you and the enemy. Regular doors will slow enemies down slightly, but locked doors give you significantly more time to think strategically.
Listen Out For Enemies
As many parts of the facility are cloaked in darkness, some of your senses are impaired. But when enemies are close by, you can hear them moving or talking. Listen out for sound cues that indicate whether or not an enemy has spotted you. If you hear a chime, the enemy is aware of your location, so either start running or find a hiding spot.
All enemies make noise, such as footsteps or dialogue.
Listen out for another important sound: a heartbeat. If you hear it, that means an enemy is close, but they haven’t seen you.
Play With Friends
While you can play The Outlast Trials alone, the experience is significantly more rewarding with friends. Not to mention, you have teammates watching your back at all times. If you find yourself incapacitated, teammates can heal or protect you. You can also split up to cover more ground.
As we said before, a team can also assign different roles so that every individual is in charge of a certain aspect, be it Heal, Stun, Blind, or X-Ray. More teammates means a higher chance of completing the trial. Plus, it’s just more fun that way.