Similar to zip files, a RAR (Roshal Archive) file is a way to compress multiple files down into a single, high-quality container. Once you’ve downloaded or received RAR content, the only thing you have to do is extract it to gain access to the media and docs within. Unlike zip files though, unpacking a .rar file isn’t as simple as selecting “unzip.”
Unless you’re using Windows 11, which happens to feature native RAR support, you’re going to need to use a RAR extractor to access RAR files on macOS and older versions of Windows. Fortunately, we’ve got the know-how to teach you how it’s done, as well as a couple of recommended extractors.
What is a RAR file?
A RAR (Roshal Archive) file that has several compressed files stored within it. One of the main benefits of RAR compression is the ability to break down high-quality media into archives that can be encrypted and password-protected.
RAR files make it very easy to transfer several small files at once, and much like the ZIP container, sending and sharing RAR files is a great way to cut down on bandwidth usage and upload times.
1Password
Native RAR support for Windows 11
On previous versions of Windows (as covered in our next section), you would need to use a RAR extractor to unpack .rar content. But Windows 11 actually features built-in support for RAR, so there’s no need for specialized extraction tools. Here’s how to open a RAR file with Windows 11:
Step 1: Launch File Explorer and locate the RAR file you’d like to extract. Then, double-click to open the RAR.
Step 2: Select the items you wish to extract, then right-click the files and select Copy.
Step 3: Once you’ve decided what folder, drive, or desktop you’d like to store these files on, right-click and select Paste.
Step 4: You can also right-click your RAR folder and choose Extract all…. Then just click Browse to search for an end-point folder.
Once you’ve found one, click Select folder > Extract.
7-Zip (Windows)
Step 1: Download 7-Zip from the official website. If you’re running the latest version of Windows 10 or 11, chances are you want the 64-bit version, but it’s a good idea to confirm which version of Windows you’re running first.
When in the installer, select your desired destination folder for the utility and click the Install button in the bottom-right corner of the window. Click the Finish button when done, and launch the program.

Digital Trends
Step 2: Locate the RAR file that you want to open in Windows File Explorer, then right-click it, and select Open With > 7-Zip.

Digital Trends
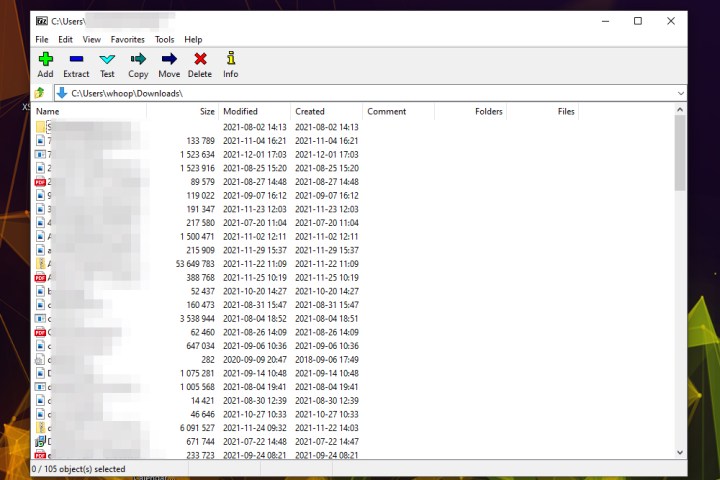
Step 3: With the RAR file now open, you have a number of options for what you can do with it. You can access individual files within the RAR archive by double-clicking them, or navigate through folders in the same way to dig deeper into the RAR file.
If you want to be able to access the files within the RAR archive more easily in the future, you can also click the Extract button and select a save location. The RAR file will then be extracted, leaving all of its component, files, and folders accessible through the Windows File Explorer.

Digital Trends
The Unarchiver (macOS)
Unarchiver easily trumps the built-in archive unpacker that comes with macOS — aka the aptly titled Archive Utility. The program offers support for a more significant number of file formats, including RAR files, and offers additional functionality more akin to 7-Zip than other available offerings on the web. Though Unarchiver cannot create RAR files, it still allows you to open RARs with just a few steps.
Step 1: Download Unarchiver from the official site, or head over to the App Store to download the application. Afterward, extract the file and launch the program.
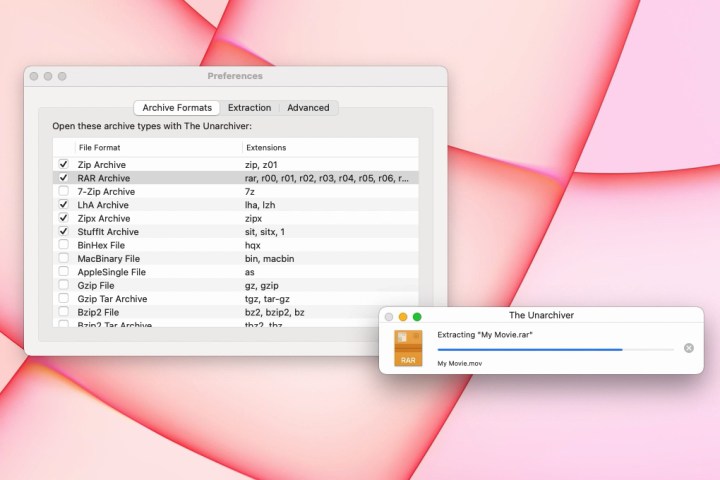
Step 2: Once opened, ensure the box beside RAR Archive is checked — along with any other archive types you wish to open with the Unarchiver — and click the Extraction tab located at the top of the application window.
Afterward, select your save location for the resulting file from the drop-down menu near the top of the window, control-click the RAR file you wish to open, and choose the Unarchiver from the drop-down menu beside the Open With option.

Digital Trends
Step 3: The utility will then automatically create and save a file with the same name as the RAR file in the previously specified location. Then, simply double-click the RAR file to launch it in the appropriate program.
Editors’ Recommendations


