
Derek Malcolm / Digital Trends
Are you tired of your music library feeling stale and repetitive? Could you create the perfect atmosphere for any occasion with just the right mix of songs?
While playlists offer a fantastic way to personalize your listening experience on Spotify, navigating their features and maximizing their potential can sometimes feel overwhelming. There’s much to learn from the initial steps of adding songs and organizing them to the finer points of customizing artwork and collaborating with friends.
That’s why we’ve created this comprehensive guide to help you master the art of creating and editing Spotify playlists. Whether you prefer the desktop app or the convenience of mobile, we’ll provide clear, step-by-step instructions to empower you to curate, personalize, and share your musical creations easily. Get ready to transform your listening experience and become a true Spotify playlist pro on one of the best streaming services on the planet.
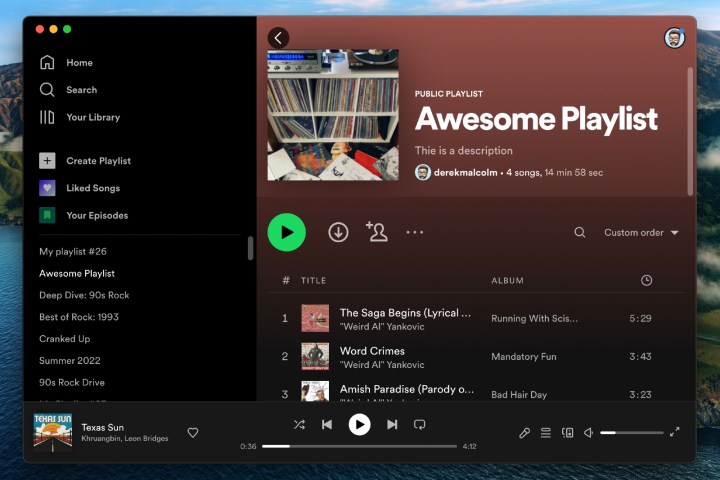
Image used with permission by copyright holder
Making a Spotify playlist on the desktop app (Mac or PC)
Here’s how to create a new playlist on the Spotify desktop app on a PC or Mac computer.
Step 1: Select the + create playlist button on the lefthand side of the window.
Step 2: Spotify will automatically give it a temporary name, like “MyPlaylist#24.” Change that to the name of your playlist.

Image used with permission by copyright holder
Step 3: You can also opt to give your playlist a description or add an image to represent it.
Note: if you don’t add a custom playlist image, Spotify will automatically generate an image based on the album covers from your playlist.
Step 4: Add songs to your playlist by using the Search bar for artists, songs, or podcast episodes you want to add.
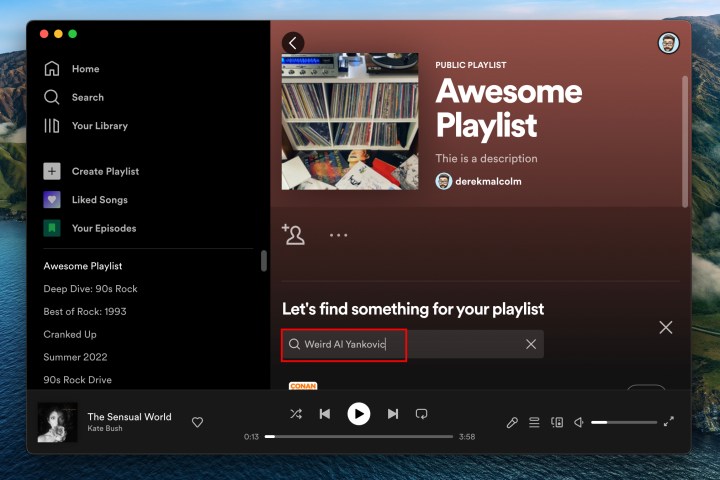
Image used with permission by copyright holder
Step 5: When you find what you’re looking for, click the Add button to the right of the title.
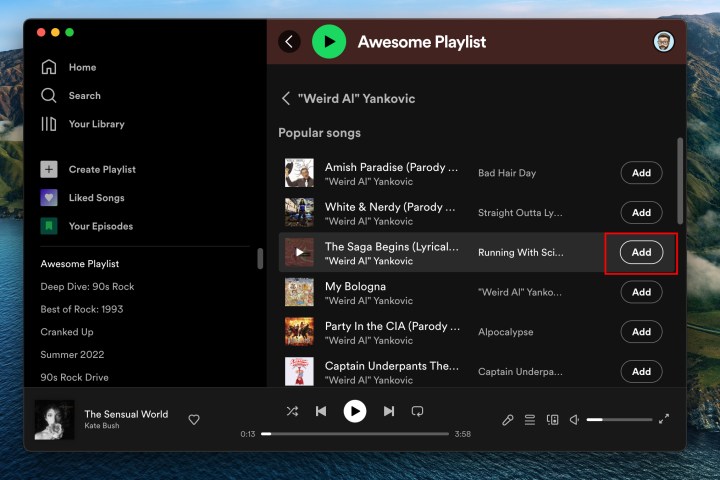
Image used with permission by copyright holder
Step 6: Alternately, you can add songs to your playlists as you browse around Spotify. If you find a song you want to add, be it from another playlist or Spotify-recommended music, just click the Three-dot menu to the right of the song and select Add to playlist. Choose the playlist you want and it will be added.

Image used with permission by copyright holder
Making a Spotify playlist on Android or iOS
Creating a playlist on your smartphone or tablet’s app is very similar to the desktop experience.
Step 1: Select the Your library tab at bottom of the screen.
Step 2: Tap the Plus sign symbol on the top right of the screen.
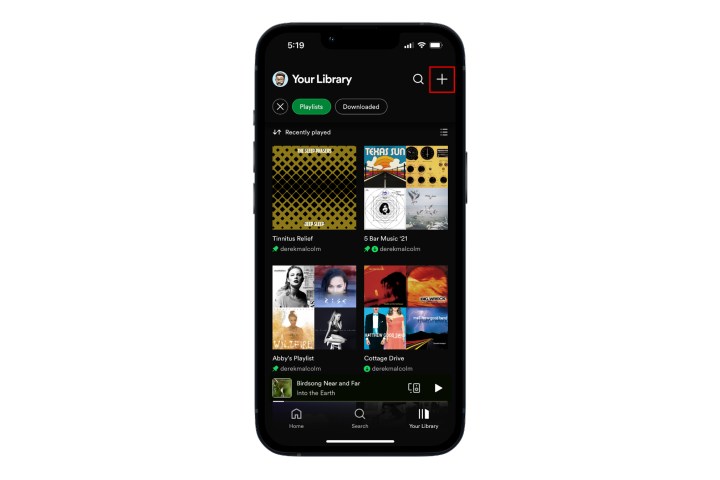
Image used with permission by copyright holder
Step 3: A dialogue will ask you to name the playlist. Give your playlist a name and tap Create.
Step 4: Tap the Add songs button to begin searching for artists and tracks you want to add to your playlist.
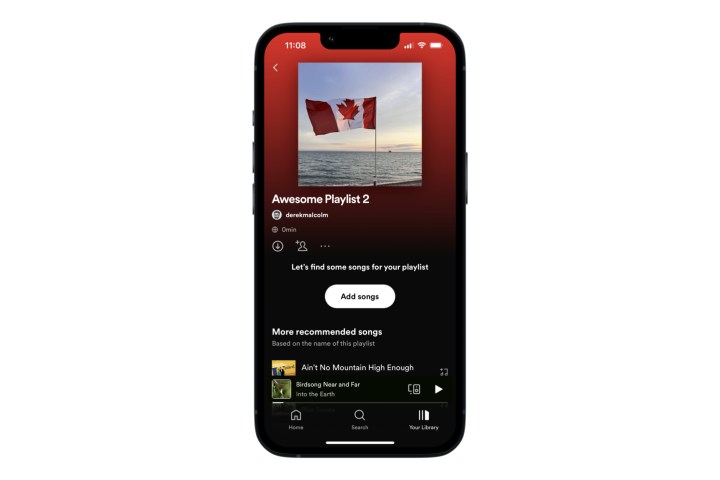
Image used with permission by copyright holder
Step 5: When you find a song you want, tap the Plus sign symbol next to it to add it. That’s it.

Spotify
Editing and sharing your playlists (for desktop and mobile)
You can do a ton of things with your playlists, such as sharing them with friends, making them collaborative so others can add to them, and downloading them for offline listening. These steps are pretty much the same for the desktop and mobile app experiences, so we’ve included them together here.
Remove a song: Either right-click on the song in your playlist or select/tap the Triple-dot button to the right of the song information, then select Remove from this playlist.
Download your playlist: Navigate to your playlist, then click or tap the Download down-arrow icon on the screen. On the desktop app, you can also right-click on the playlist name on the left side of your screen, then select Download from the menu. Your playlist will now be able to play without access to the internet. Note that this feature is only available to Premium members.
Make playlist secret or public: To change whether your playlist is visible to others on Spotify, open the playlist and click or tap the Triple-dot button under the playlist’s name; it will be next to the Play button. Next, select either Make public or Make private to change its current state.
Make playlist collaborative: Want others to be able to edit or add your playlist? Tap the little Head and shoulders icon with the little plus sign or select the Triple-dot button under the playlist’s name, then select Invite collaborators. You’ll be presented with several ways to send someone the invite — link, WhatsApp, text message, Messenger, etc. Once they’re added, you’ll see their profile icons attached to the playlist.
Share with friends: To share your playlist, click or tap the Triple-dot button next to the playlist’s name. Next, scroll down to the Share option — here, you can pick how you wish to share your playlist. For a simple web link, select the Copy link option.
Delete a playlist: To completely delete your playlist, click or tap the Triple-dot button under the playlist’s name. Next, select the Delete playlist button, and press Delete again to confirm.
We love Spotify, but if you need a break, check out our step-by-step guide to canceling your Spotify Premium account.


